Last updated November 18, 2026



Free written scope consultation - allowances, timeline, and change-order rules on paper before a single trade is scheduled
Driveway & Pavers Troubleshooting: Common Problems and How to Fix Them
Pouring polymeric sand into a sinking paver is like painting over a water stain. It looks fixed until the next rain. The real failure almost always started six inches underground, in the base layer nobody sees once the job is done. We’ve walked hundreds of driveways around Sunrise Manor, and the same handful of problems show up over and over. Most aren’t bad luck. They trace back to one of four root causes, and knowing which one you’re dealing with decides whether a repair lasts ten years or buys you another wet season of the same headache. This guide covers what each failure looks like, how to tell them apart, and how to document a problem before anyone quotes you a fix.
Quick Answer
Most driveway paver problems fall into four root causes: base failure (the compacted gravel layer underneath has settled or was never deep enough), soil erosion (water is washing the subgrade out from below), tree root intrusion (roots are heaving pavers upward), and drainage or sealer issues (water pooling or trapped moisture staining the surface). Identifying the cause first is what separates a repair that lasts from a patch that fails by next spring. Crack pattern and location tell you which one you’re facing.
Styles & brands we work with
- Kitchen remodeling
- Bathroom remodeling
- Home additions & ADU
- Roofing
- Windows & doors
- Driveway & pavers
- Fence
Table of Contents
- Sinking and Settlement: Base Failure vs. Soil Erosion
- Reading Crack Patterns: One-Time Repair vs. Systemic Drainage
- Tree Root Intrusion and What It Does to Pavers
- White Staining (Efflorescence) and Why It’s Not a Defective Paver
- The Wobbly Paver: 20-Minute Reset vs. Pulling a Section
- How to Document the Problem Before You Call Anyone
- Why Sunrise Manor Conditions Make Pavers Fail Differently
- Preventing the Next Failure
Sinking and Settlement: Base Failure vs. Soil Erosion
A driveway that dips in one spot and stays put is telling you something different from a driveway that dips a little everywhere. The first is usually soil erosion underneath. The second is base failure. Both look like a sunken paver from the surface, and both get “fixed” the same way by people who don’t check underneath: lift the paver, dump in some sand, set it back down, walk away. That works for about one rainy season.
Base failure means the compacted gravel layer under the pavers was never deep enough, wasn’t compacted in lifts, or has slowly consolidated under traffic over time. It shows up as broad, gradual settlement, often across a whole wheel path or the apron where the driveway meets the street. On a Sunrise Manor driveway where summer ground temperatures push past 110°F and the soil dries and shrinks hard, a base that’s only three inches deep instead of the recommended four to six will show wear within a few years.
Soil erosion is water doing the damage. It carves out a void under the base and the paver drops into it. You’ll usually see this near a downspout, at the low edge of the driveway, or anywhere water runs off the roof and across the pavers instead of away from them. The tell: the sinkhole is localized, sometimes bowl-shaped, and there’s often a wet spot or a stain line that doesn’t match the rest of the surface.
The fix differs because the cause differs. Base failure means pulling up a section, excavating, re-compacting gravel in lifts, and resetting with fresh bedding sand. Soil erosion means fixing the water source first (extending a downspout, adding a swale, re-grading the edge) or the new base will erode out too. A contractor who quotes the same fix for both hasn’t looked underneath. Ask what they found when they pulled a paver.
Reading Crack Patterns: One-Time Repair vs. Systemic Drainage
Pavers crack for different reasons, and the pattern tells you which. A single cracked paver in the middle of a field, with everything around it flat and stable, is usually impact damage: something heavy dropped, a vehicle with a narrow tire, a paver that was already chipped from the factory. Lift and replace that one paver. The job is done.
What you’re actually looking for is whether the crack is isolated or following a line.
- Stair-step cracking that runs diagonally across joints from paver to paver usually signals underlying settlement. The pavers are hinging on a base that dropped.
- Straight-line cracking along one axis, especially at the driveway apron or where two sections meet, often points to a joint that wasn’t allowed to expand with heat. Sunrise Manor summer temperatures will find a tight joint.
- Spider cracking radiating from one point is almost always impact or a paver sitting on a voided base.
- Multiple cracks with no pattern across an aged driveway, especially one that’s 15-plus years old, is wear. The pavers are tired. Replacement of the worst section may be the honest answer.
Here’s the part most people miss: if a crack keeps coming back after a paver is replaced, you don’t have a paver problem. You have a drainage or base problem that keeps loading the same spot. Replacing pavers in that situation is like changing a tire that keeps going flat. Diagnostic first, then fix. A clear crack pattern review takes a pro ten minutes on site.
Tree Root Intrusion and What It Does to Pavers
Tree roots heave pavers upward, not downward. If you’re seeing one section of the driveway lifted and tilted, with individual pavers rocked up at an angle like plates stacked wrong, look for the tree. In Sunrise Manor neighborhoods with mature mesquite, palm roots, and older ficus, driveway intrusion is more common than people expect, because the roots travel farther than the canopy suggests.
Root heave looks specific: a crown or hump in the surface, pavers visibly tilted, joints opening up, and often the sand bedding disappears into the gap where the root has pushed through. You’ll sometimes see a root itself if you lift the paver. The fix depends on the tree.
- Confirm it’s roots. Lift one paver near the hump. A root will be visible, often a pale lateral root running along the bedding.
- Do not cut a structural root without an arborist. Removing a large root can kill a mature tree or destabilize it in a windstorm.
- Options for a live tree: reroute a small section of pavers around the root crown, install a root barrier if the tree is young enough that it will work, or accept a hump and reset the affected pavers to accommodate the root. Root barriers have to be installed at construction, not retrofitted to mature roots.
- Options for a dead or removed tree: excavate the root, remove what’s underneath, re-compact the base, and reset. This is more work than it sounds.
We’ve seen homeowners cut a big root to save the driveway, then lose the tree two years later. If the tree matters, get an arborist’s opinion before anyone cuts. Barrett & Sons Construction won’t touch a structural root without a written note that we’ve recommended an arborist consult. It’s in the scope before the first paver lifts.
White Staining (Efflorescence) and Why It’s Not a Defective Paver
Efflorescence is the chalky white salt deposit that appears on concrete pavers when moisture migrates through the stone, dissolves mineral salts, and deposits them on the surface as the water evaporates. It looks like a defect. It isn’t. It’s a moisture issue, and in most cases it’s a sealer or drainage issue, not a bad paver.
The mechanics: water enters the paver from the soil underneath (usually), travels up through the pores, and dries on the surface, leaving the salt. If your driveway drains poorly, sits in low shade, or was sealed too early with a film-forming sealer before the pavers fully cured, the moisture has nowhere to go. In Sunrise Manor, the reverse is also true: months of dry heat followed by a monsoon rain can flush salts up through pavers that were never given a breather coat.
What actually works:
- Don’t seal a new driveway for at least 60 to 90 days. Pavers need time to release their manufacturing moisture. Sealing too soon traps water and guarantees efflorescence.
- Use a breathable penetrating sealer (siloxane or silane-based) rather than a film-forming acrylic. Penetrating sealers block water from entering but let vapor out.
- Clean efflorescence with a diluted white vinegar wash or a commercial efflorescence remover, applied to a wet surface, then rinse thoroughly. Don’t use muriatic acid on most pavers; it can etch the surface.
- Fix the water source. If water is migrating up from a poorly drained base, no sealer will fix it long-term.
If efflorescence keeps coming back after a proper clean and re-seal, the answer is under the pavers, not on them. Look at grading and drainage first, then products.
The Wobbly Paver: 20-Minute Reset vs. Pulling a Section
A single paver that rocks underfoot when you step on it can be a quick fix or a warning. Here’s how to tell the difference before you do anything.
You have a 20-minute reset if all of these are true:
- The paver rocks but the pavers around it don’t.
- The joint sand is intact but the sand bedding under that one paver is gone (you can feel the paver drop 1/8 to 1/4 inch and come back).
- No water sits near that paver, no crack runs through it, and it’s not at a low edge of the driveway.
- The problem appeared recently, after a heavy rain or from a heavy load, and hasn’t spread.
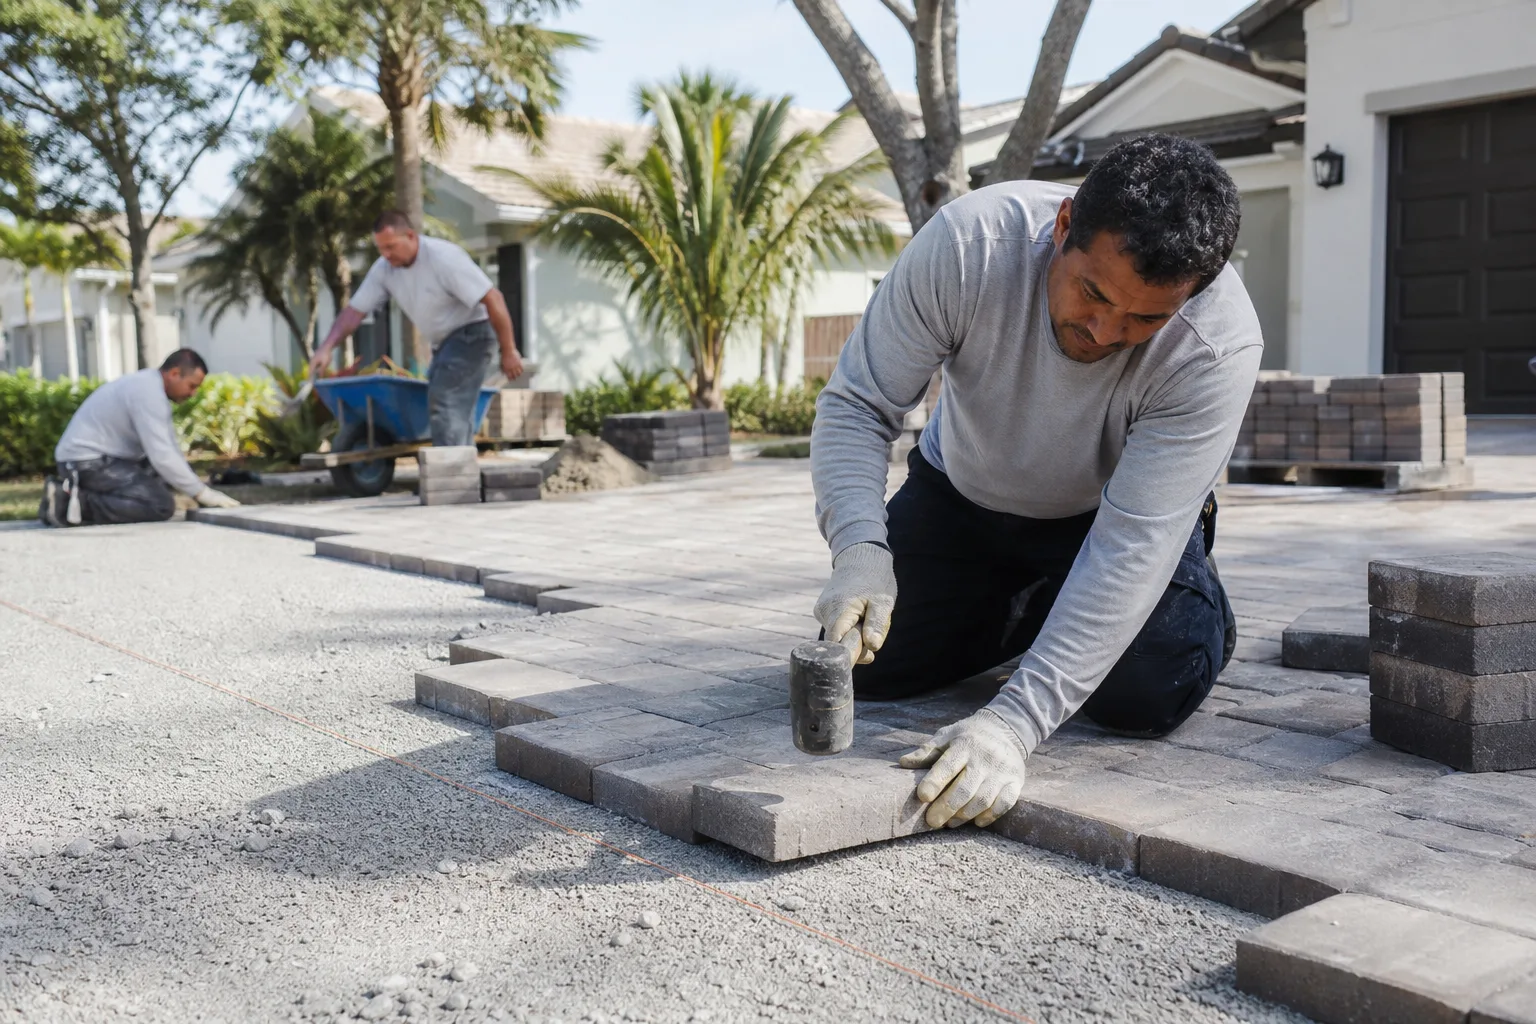
The reset: lift the paver with a pair of paver pullers or a thin pry bar, clear out the loose sand and any debris under it, top up the bedding sand to make up the difference, tamp the sand lightly, set the paver back down with a rubber mallet, and sweep joint sand into the gap once it’s settled. That’s it.
You need to pull a section if:
- More than one paver is affected, or the whole row is loose.
- The paver rocks 1/2 inch or more, or has sunk relative to its neighbors.
- There’s visible water tracking through the joints nearby, or the paver is at the driveway apron or edge.
- You find a void (a hollow spot) when you lift the paver and can push the base down with your hand.
That last point is the one that matters. A void means the base has eroded or settled. The pavers above will keep failing until the base is fixed. Pulling a 10-square-foot section, repacking base in 2-inch lifts with a plate compactor, and resetting is the actual repair. Anything less is temporary.
We’ve seen homeowners chase a single wobbly paver around a Sunrise Manor driveway for three years because the base was voided under a downspout discharge. One afternoon of digging and repacking would have ended it. Scope in writing means you know which repair you’re paying for before the first paver lifts.
How to Document the Problem Before You Call Anyone
Before you call any contractor, gather the evidence. This protects you from being quoted more work than you need, and it lets the honest contractor quote accurately from the first visit.
- Photos with a straightedge. Lay a 4-foot level or straightedge across the problem area and photograph the gap. This shows the exact dip or rise and gives a real number instead of “it looks low.”
- Wide photos for context. Step back and shoot the whole driveway from the street and from the house. Mark up the location of the problem.
- Note the water paths. Where does water run during a rain? A garden hose set to a slow trickle at the high side and observed for 20 minutes will show you. Photograph the runoff.
- Note the age of the pavers if known, and who installed them. Repair decisions change if the driveway is 3 years old and possibly under a workmanship warranty vs. 20 years old.
- Measure the affected area. Length by width in feet. Contractors price paver work by the square foot.
- Note the tree locations. If any trees are within 15 feet of the problem area, mention it. It changes the diagnosis.
- Ask for the fix in writing. The best document you can get is a line-item scope: how many square feet are being pulled, how much base is being replaced, what brand and type of paver is being used to match (Cambridge Pavers and Oldcastle are the ones we install most often, and matching matters), and what the joint sand and sealer will be.
Barrett & Sons Construction issues every scope, every allowance, and every price change in writing before work proceeds. An allowance that isn’t on paper is a surprise waiting for a date. When you get quotes, compare the scopes line by line, not just the bottom-line number.
Why Sunrise Manor Conditions Make Pavers Fail Differently
Sunrise Manor is high desert with a monsoon spike. Summer ground temps hit 130°F at surface level on an unshaded drive, and the soil under the base dries and shrinks hard. Then July and August dump two inches of rain in an hour. That combination stresses a driveway differently than a coastal climate does, and it’s why certain failures show up here that don’t show up elsewhere.
- Drying and shrinking subgrade. Clay-heavy soils expand when wet and contract when dry. Over years, this movement opens voids under a base that wasn’t compacted in lifts, and the pavers above start to settle.
- Monsoon runoff overwhelms grading. A driveway that graded fine in the dry season can flood the base in a monsoon because the surrounding soil has hardened and runoff runs over the pavers instead of soaking in.
- Efflorescence after monsoon. The first rains after a dry summer flush salts up through pavers. This is why we don’t seal in the summer and why the breathable sealer matters.
- UV and heat cycling. Joint sand dries and hardens faster here than most places. If polymeric sand was installed wrong (too wet during cure, or applied in the wrong temperature window), it will fail as a shell within one summer and let sand wash out.
If a Sunrise Manor driveway is showing problems in its first three years, the base depth and compaction are the first things to check. A paver is only as good as what’s under it, and in our climate that matters more than anywhere. We’ve seen Cambridge Pavers and Oldcastle pavers both perform for decades when the base is right and fail in five years when it isn’t. The brand isn’t the problem.
Preventing the Next Failure
The repairs above stick if the conditions that caused the failure get fixed. A reset paver over a live drainage problem will fail again. Here’s what holds up long term:
- Manage roof water. Extend downspouts past the driveway edge. Add a splash block that moves water at least 4 feet away. In Sunrise Manor, the roof-to-driveway water path is the single most common cause of paver erosion.
- Re-sweep joints every spring. Joint sand is the pavers’ shock absorber. When it washes out, pavers move. A 20-minute sweep with a bag of Sakrete or Quikrete joint sand in April prevents most minor settlement.
- Don’t park heavy vehicles on the same spot daily. A work truck or a heavy SUV parked in the same two pavers for years can settle a base that would otherwise hold. Rotate parking or use a parking pad.
- Re-seal every 3 to 5 years with a breathable product. Not annually. Over-sealing causes more problems than it solves.
- Watch the apron and edges. The driveway apron and the edge restraints are where failures start. If the paver edge is pulling away from the concrete apron or from the edge restraint, address it early. That’s a $200 to $500 fix that becomes a $2,000 section repair if left alone.
Common Mistakes to Avoid
- Filling a settled paver with sand without lifting it. Sand poured on top of a settled paver fills the joint and hides the void. Six months later the paver is back to sinking. Always lift and check the bedding.
- Sealing a new driveway in under 60 days. The pavers haven’t finished releasing moisture. Sealing locks it in and guarantees efflorescence and sometimes spalling.
- Treating efflorescence with muriatic acid. On most modern concrete pavers, muriatic acid etches the surface and dulls the finish. White vinegar or a purpose-made efflorescence remover is the right first step.
- Cutting a mature tree root to save a paver. That root might be holding the tree up. Arborist before saw, always.
- Adding more pavers over a bad base. If the base failed, more pavers just mean more pavers sitting on a failed base. Pull, excavate, repack, reset.
- Accepting a phone estimate on a paver repair. Nobody can diagnose a base failure without lifting a paver. An estimate given from the street is a guess. Get eyes and hands on it.
- Not asking who pulls the permit. Driveway widening or replacing a driveway apron near the street usually touches right-of-way. Ask. A permit inspector working for you is a good thing.
See the difference
 Before
 After
 Before
 After
 Before
 After
When to Call a Professional
Some paver problems are genuinely a weekend reset. Some look like one and aren’t. Call a pro when any of these are true: the void under a paver goes down more than 1/4 inch, more than two pavers are affected, water is tracking through joints after a rain, a tree root is visible under a lifted paver, or a crack keeps coming back after a replacement. Also call when the driveway apron drops significantly – that’s often a base failure under high-traffic load and it needs proper excavation, not a reset. We’ve seen enough Sunrise Manor driveways to know when a phone consult can save a homeowner from an unnecessary $3,000 repair, and we’ll say so. Barrett & Sons Construction offers free estimates in Sunrise Manor – call (844) 312-0069. Free second opinions on any written estimate too, no trip charge inside the county.
For a broader look at what paver work involves from the install side, the Driveway & Pavers in Sunrise Manor page covers materials, brands, and options. And if the driveway failure traces back to a fence line sagging next to it, or a paver apron that can’t hold up under a new gate, that’s a conversation the Fence Installation in Sunrise Manor page covers well. Homeowners planning a bigger picture project, like an addition or a detached structure, should also see Home Additions & ADU in Sunrise Manor because grading and hardscape interconnect with structural work.
Frequently Asked Questions
Small repairs – resetting a single paver, re-sanding joints, replacing one broken paver – typically run $150 to $400. Section repairs that require pulling up 10 to 50 square feet, re-compacting the base, and resetting pavers run $800 to $2,500 depending on area and access. Base failures that require excavation and full rebuild under a section are $15 to $30 per square foot. A written line-item scope is the way to know what you’re paying for. Call (844) 312-0069 for an exact quote – estimates are free.
No, not for structural cracks. Joint sand is meant to sit between stable pavers to lock them, not to fill cracks. If a paver is cracked, the paver needs replacing; if a joint is opening up because pavers are moving, sand will wash out within one monsoon. Fix the movement first, then re-sand.
That’s efflorescence – mineral salts migrating to the surface as moisture evaporates through the paver. It’s a moisture issue, not a defect in the paver. Fix the water source (usually drainage or a film-forming sealer trapping vapor), clean with a diluted white vinegar wash, and re-seal with a breathable penetrating sealer. In Sunrise Manor, the first monsoon after a dry summer is when it shows up most. If it keeps returning, call us to look at drainage before throwing more sealer at it – call (844) 312-0069.
Base failure = gradual, broad settlement, usually across a wheel path or the driveway apron. Soil erosion = a localized bowl-shaped sinkhole, often near a downspout, low edge, or a tree. Lift a paver in the problem area and look. Loose, packed gravel that’s still firm but shallow is a base-depth issue. A void where you can push down with your hand is erosion. The two fixes differ, so diagnosis first.
Sometimes, but it depends on the concrete’s condition. If the existing slab is stable, uncracked, and drains properly, a paver overlay on a 1-inch sand bed can work. If the slab is cracked, heaving, or holding water, the pavers will fail too. In high-desert heat, a slab that has been in place 20-plus years usually has cracks that make overlay risky. Get a professional assessment before committing – a 10-minute on-site look tells you which way to go. Call (844) 312-0069 for a free estimate.
Simple paver replacement (lift and reset) usually doesn’t require a permit. Replacing an entire driveway apron near the street right-of-way, widening a driveway, or altering drainage that ties into a swale often does. If a contractor tells you permits are optional on a driveway that touches the right-of-way, that’s a warning sign. Ask for the permit number in writing. On eligible jobs, we pull the permit and get the inspection signed, and the inspector works for you, not for us.
The Bottom Line
Almost every paver problem has an actual cause, and identifying the cause first is what makes a repair hold. Settlement that’s broad and gradual is a base problem. A bowl-shaped sinkhole is erosion. A hump is roots. Random cracking in a pattern is drainage or base. White chalky staining is moisture or sealer. Replacing pavers without fixing the cause just postpones the same call to next year. Document the problem, get a line-item scope in writing, and don’t accept a phone estimate on paver work. And keep the same eye on the rest of the property – Barrett & Sons Construction Sunrise Manor home is the best place to start when the driveway repair turns into a bigger exterior project. Our crews have up to 28 years of experience across hardscape, fence, roofing, and additions, and every eligible job comes with permits pulled, inspections signed, and a 90-Day Done Right Promise in writing.
Ready for a real look at your driveway?
We’re happy to come out, lift a paver, and tell you honestly what’s underneath. Free estimates in Sunrise Manor, no trip charge inside the county, and a free second opinion on any written estimate you’ve already got. Ask anyone on your street or look up the license number yourself. Call (844) 312-0069 – a live person answers, 24 hours a day.
Written by the team at Barrett & Sons Construction Sunrise Manor.